A Simple Step-by-Step Guide on How to Clean 3D Printer Beds for Optimal Performance

3D printing has become an indispensable technology for designers, hobbyists, and engineers alike. Its ability to turn digital models into tangible objects has created vast possibilities across various industries. However, the success of a 3D print is not determined by the printer alone; the 3D printer bed plays an essential role in ensuring the final product adheres properly and prints smoothly. An improperly cleaned print bed can lead to a multitude of problems, such as failed prints, poor adhesion, and surface defects.
Understanding the importance of cleaning your 3D printer bed and maintaining its performance is crucial. In this detailed guide, we will walk through the essential steps for cleaning your 3D printer bed effectively. This comprehensive process will help maintain the bed in excellent condition, reduce print failures, and ultimately improve the quality of your prints.
Why Cleaning Your 3D Printer Bed is Important
The print bed of a 3D printer is essentially the foundation upon which each print begins. It serves as the surface where the first layers of filament are deposited and must be as clean as possible to ensure proper adhesion. Regular cleaning of the printer bed is essential because the following issues can arise from a dirty or poorly maintained bed:
1. Poor Adhesion
Proper adhesion is one of the primary factors in the success of a 3D print. A clean bed allows the filament to stick to the surface, forming a strong foundation for the print. When the bed is dirty, dust, oils, and filament residue can create barriers between the bed and the first layer of filament, leading to poor adhesion. This can cause the print to shift, warp, or even detach from the bed mid-print. A consistent, clean surface ensures strong adhesion and better first-layer performance, which in turn leads to better overall print quality.
2. Warping and Failed Prints
Warping is a common issue in 3D printing, especially with filaments like ABS, that are prone to shrinking and pulling away from the print bed. One of the primary causes of warping is an uneven or contaminated surface that does not maintain consistent heat distribution across the bed. Dust, filament residue, and oil from your hands can disrupt the even heating of the bed, exacerbating warping. Regular cleaning helps prevent such issues by ensuring the bed surface is smooth and free from contaminants.
3. Reduced Print Quality
A clean print bed improves the quality of your prints. When dirt or residue builds up on the bed, the print surface becomes uneven, resulting in inconsistent first layers. Even minor imperfections in the first layer can transfer throughout the print, creating bumps, gaps, or rough spots. This can lead to prints that are aesthetically unpleasant or structurally weak. Cleaning the bed removes these imperfections and sets the foundation for smooth, high-quality prints.
4. Prevention of Print Failures
Many 3D printing issues are caused by improper bed adhesion or contamination. Prints that fail to stick to the bed may detach or shift during printing, causing the print to fail altogether. Regular cleaning ensures that the bed is in optimal condition to hold the print in place, reducing the risk of print failures. It also reduces the likelihood of nozzle clogs caused by excessive filament buildup, which can block the flow of filament and stop the print.
5. Prolonging the Life of the Bed Surface
Most 3D printer beds are made of materials like glass, PEI (Polyetherimide), or aluminum, which can wear down over time due to exposure to filament residue, oils, or adhesives. Regular cleaning prevents the buildup of residue that can lead to damage or degradation of the bed surface. Keeping the bed clean helps preserve its longevity, which ultimately saves you money by extending the lifespan of your printer bed.
Step 1: Gather Your Tools and Materials
Before diving into the cleaning process, it’s essential to gather the necessary tools and materials. Using the right tools ensures a thorough and safe cleaning process that will protect your printer bed while achieving optimal results.
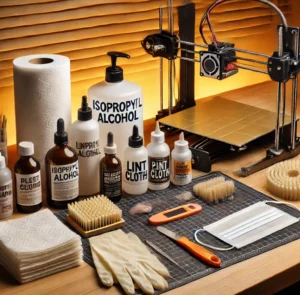
1. Isopropyl Alcohol (IPA)
Isopropyl alcohol is one of the most effective cleaning agents for 3D printer beds. It is excellent for removing oils, dust, and sticky residues that may be left behind by previous prints or adhesive substances. A concentration of at least 70% isopropyl alcohol is sufficient, but higher concentrations of 90% or 99% work even better, particularly for removing stubborn residues.
2. Lint-Free Cloths or Paper Towels
Using a lint-free cloth or paper towels is essential for cleaning your print bed without leaving behind fibers. Lint or towel fibers can affect the adhesion of future prints, potentially leading to print failures. Be sure to use a soft, non-abrasive cloth that won’t scratch or damage the bed surface.
3. Scraper or Spatula
A plastic scraper or spatula is useful for removing stuck prints, leftover filament, or other debris from the print bed. A metal tool can scratch the bed, which could cause long-term damage, so always use plastic or a non-abrasive tool when scraping the bed. Gently lift the edges of stuck prints and debris to remove them without damaging the surface.
4. Soft Brush
A soft brush, such as a paintbrush or toothbrush, is ideal for removing small bits of filament or dust from the bed. The brush helps to clean in hard-to-reach areas and ensures that loose debris does not remain on the surface.
5. Warm Water (Optional)
For particularly sticky or stubborn residues, warm water can help to loosen up the filament or adhesive. It is particularly useful for cleaning after prints with support material or sticky residues that are difficult to remove with alcohol alone. Ensure that the bed surface is designed to withstand warm water cleaning, as some materials may warp with excessive heat.
6. Gloves
Wearing gloves during the cleaning process helps protect your bed from oils and dirt that can be transferred from your hands. This is especially important when cleaning sensitive bed surfaces like PEI or glass.
7. Replacement Parts (Optional)
If your print bed is heavily scratched, worn, or damaged, you may need to replace the bed or its surface. For example, PEI sheets can become worn over time and may require replacement to maintain adhesion. Having replacement parts on hand ensures that your bed surface remains functional and effective.
Step 2: Power Off Your Printer
Before beginning the cleaning process, ensure that your 3D printer is powered off. This step is essential for safety reasons. If your printer uses a heated bed, it’s important to allow the bed to cool down before cleaning. Cleaning a heated bed while it’s still hot can lead to burns or damage to the print surface.
Cool Down the Heated Bed
Most 3D printers with heated beds can reach temperatures up to 100°C or higher. Allow the bed to cool down to room temperature before handling it. This prevents injury and ensures that you can clean the surface without causing damage to the bed or other components.
Turn Off the Printer to Prevent Movement
When cleaning the bed, turning off the printer also prevents the print head or bed from moving unexpectedly. This is particularly important if you’re using a manual cleaning method, as the bed or print head could potentially cause damage if moved during cleaning.
Step 3: Remove Any Leftover Prints and Debris
Once the printer is powered off and the bed has cooled, it’s time to remove any leftover prints and debris from the surface. This is an essential step to ensure that the bed is as clean as possible before you begin the actual cleaning process.
Removing Prints from the Bed
Start by gently removing any prints that are still adhered to the bed. Use a plastic scraper or spatula to lift the edges of the print and slowly work your way around it. Be gentle to avoid damaging the bed surface. If the print is difficult to remove, you can slightly heat the bed (around 50°C to 60°C) to soften the filament, making it easier to detach the print.
Removing Residue and Debris
After removing the print, you’ll likely notice some leftover filament or residue on the bed. These remnants can affect future prints, so it’s important to remove them. Use a soft brush to sweep away any loose debris or filament particles from the surface. The soft bristles will help remove dust and small particles without scratching the bed.
Step 4: Clean the Bed Surface
Now that the prints and debris have been removed, it’s time to clean the bed surface itself. The cleaning method will vary depending on the type of bed you have.
For Glass Beds
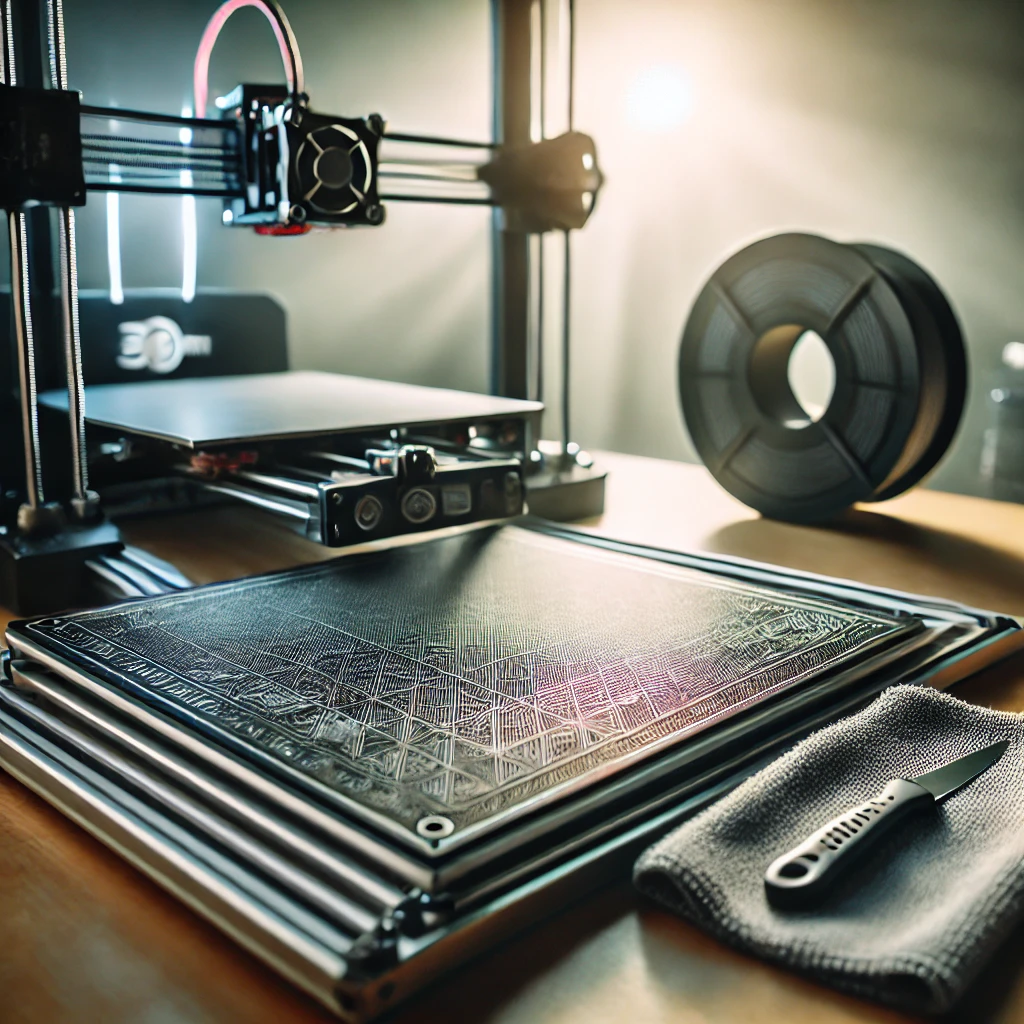
Glass is one of the most common bed materials because it provides a smooth, flat surface that is easy to clean. To clean a glass bed, soak a lint-free cloth in isopropyl alcohol and wipe the surface thoroughly. The alcohol will remove oils, dust, and filament residue without leaving behind fibers. For stubborn filament residue, use a plastic scraper to gently lift it from the surface.
For PEI Beds
PEI (Polyetherimide) beds are known for their excellent adhesion properties. However, over time, oils and residue can build up on the surface, reducing its effectiveness. To clean a PEI bed, use isopropyl alcohol or warm water. If the adhesion starts to weaken, lightly sand the surface with fine-grit sandpaper to restore its texture and grip.
For Magnetic or Flexible Beds
Magnetic beds are easy to remove and clean, but they require extra care to avoid damage. To clean a magnetic bed, first remove the magnetic sheet from the printer and wipe it down with isopropyl alcohol. If there is stubborn residue, warm water can be used to loosen it. Be sure to avoid harsh chemicals or abrasives that may damage the magnetic properties of the bed.
Step 5: Dealing with Stubborn Residue
Occasionally, you may encounter residue that is difficult to remove with standard cleaning methods. In these cases, you can try the following techniques:
Using Warm Water
Warm water can help loosen stubborn filament or adhesive residues. Soak a cloth in warm water and place it over the affected area for a few minutes. The heat will soften the residue, making it easier to remove. Be sure to dry the bed thoroughly after cleaning.
Using Glass Cleaner
If the bed has sticky residue from oils or adhesives, you can use a non-abrasive glass cleaner. Spray a small amount of cleaner onto a soft cloth and gently wipe down the bed. This can remove oils and adhesives without damaging the surface.
Plastic Scrapers
For any remaining filament residue, use a plastic scraper to carefully lift it from the bed. Always apply gentle pressure to avoid scratching or damaging the surface.
Step 6: Dry and Inspect the Bed
Once the bed has been cleaned, it’s important to dry it thoroughly. Use a clean, dry cloth to remove any moisture from the surface. Inspect the bed carefully for any remaining debris or damage. Ensure that the bed is free from residue before proceeding.
Inspect for Damage
While drying the bed, check for any signs of wear or damage. If you notice deep scratches, warping, or other issues, it may be time to replace the bed or its surface to maintain optimal print quality.
Step 7: Apply Adhesion Solution (Optional)
Once your bed is cleaned and dry, you can apply an adhesion solution to improve the sticking power of the first print layer. This is particularly useful for non-heated beds or certain filament types.
Glue Stick
A glue stick is one of the simplest and most effective ways to ensure proper adhesion. Apply a thin, even layer of glue across the bed, then allow it to dry before starting a print. This method works particularly well with PLA filaments.
Painter’s Tape
Painter’s tape is another popular solution for adhesion, especially for cold beds. Apply the tape smoothly over the bed, ensuring there are no air bubbles or wrinkles. The tape provides a consistent surface that helps the filament stick, particularly for PLA or ABS prints.
Step 8: Regular Maintenance for Optimal Results
Cleaning your 3D printer bed should be part of a regular maintenance routine. By maintaining your printer bed, you can improve the lifespan of your 3D printer and ensure high-quality prints every time.
Clean After Every Print
Cleaning the bed after each print helps prevent the buildup of filament residue, dust, and oils. This routine maintenance keeps your bed in optimal condition for the next print.
Check Bed Leveling
Regularly check the bed’s level to ensure it is correctly aligned with the nozzle. Proper bed leveling ensures even filament deposition and enhances the quality of your prints.
Inspect for Wear
Inspect the bed periodically for signs of wear or damage. If the surface becomes scratched or worn, replace it to maintain proper adhesion and print quality.
Keeping your 3D printer bed clean is essential for achieving high-quality prints, preventing print failures, and extending the lifespan of your printer. By following these detailed steps, you can ensure your bed remains in top condition, providing reliable adhesion and a smooth surface for future prints. Regular maintenance will help you avoid common printing issues, allowing you to enjoy consistent, professional results every time you print. Happy printing!


