From Novice to Expert: Experimentation and Iteration in 3D Printing
This article covers the entire journey from starting with the basics, experimenting with different settings and materials, to mastering the art of iteration. It provides useful insights into how to troubleshoot failed prints, refine your process, and improve over time. Whether you are printing basic objects or complex designs, this guide will help you navigate the challenges and unlock your potential in 3D printing.
Embracing the Journey of 3D Printing
3D printing has rapidly evolved from a niche hobby to a transformative force in various industries, including engineering, medicine, automotive, and consumer goods. What began as a tool for rapid prototyping has now become a cornerstone in manufacturing, product design, and even personal creation. However, as with any cutting-edge technology, 3D printing requires a commitment to experimentation, learning, and iteration to truly master. The journey from novice to expert is one of continuous discovery, involving a deep dive into design, materials, and techniques.
For beginners, the world of 3D printing can seem intimidating, with an array of printers, materials, and software to navigate. However, embracing experimentation and iteration from the outset can significantly reduce the learning curve and accelerate progress. The process involves not only understanding the technical aspects of 3D printing but also developing a mindset that values trial and error. Each mistake becomes an opportunity to refine your skills and achieve better results in future prints.
Mastering 3D printing is not simply about operating a machine. It is a multifaceted journey that requires a balance of technical expertise, creativity, and problem-solving. The more you experiment and iterate, the closer you get to perfecting your craft. While it may seem overwhelming at first, understanding that learning and evolving are key components of the process makes it much more approachable.
This article aims to provide a structured approach to the 3D printing journey, with a focus on how experimentation and iteration can help guide you from beginner to expert. We’ll explore the initial steps of getting started, the importance of hands-on practice, and how continual refinement of your designs leads to improved prints over time. Whether you’re just starting out or looking to take your skills to the next level, this guide will provide you with the tools and insights needed to thrive in the world of 3D printing.
As we progress through each section, the importance of a growth mindset will become clear. Instead of seeing challenges as obstacles, consider them as vital learning experiences. Iteration will be emphasized as a cornerstone of the 3D printing process, offering an opportunity to improve and adapt. By the end of this article, readers will have a clearer understanding of how they can approach 3D printing with a fresh perspective—ready to learn, adapt, and excel.
The Beginner’s Mindset: Starting Small and Learning the Basics
When you first start 3D printing, it’s important to remember that mastery takes time. Beginners are often drawn to the potential of creating complex and intricate designs right away, but it’s crucial to begin with the basics. Starting with simple projects is essential in building a foundational understanding of how 3D printers work. At this stage, it’s not about creating perfect prints—it’s about understanding the mechanics behind the technology and learning how to troubleshoot common issues.
One of the first challenges beginners face is choosing the right printer. FDM (Fused Deposition Modeling) printers are the most common and affordable option for newcomers, as they are easier to operate and understand. Popular models such as the Creality Ender-3 or Prusa Mini are user-friendly and come with plenty of online resources for guidance. It’s recommended to start with a well-supported printer model, as this allows beginners to learn from others’ experiences and avoid common pitfalls.
The next step is learning how to prepare 3D models for printing. At this point, designing your models may seem daunting, but there are numerous free resources available online that can help. Websites like Thingiverse and MyMiniFactory offer thousands of pre-made 3D models that can be downloaded and printed with minimal effort. By starting with ready-made designs, beginners can learn how to fine-tune printer settings like temperature, speed, and layer height without the added complexity of creating models from scratch.
While experimenting with your 3D printer, you will likely encounter some failures. For example, prints might not adhere to the bed, or they might be misshaped due to incorrect settings. These failures should be seen as valuable lessons, not discouraging setbacks. Understanding why prints fail and what adjustments are needed will help you build a knowledge base that will serve you well in the future. Experimenting with settings and observing how each change affects the print will gradually increase your confidence and problem-solving skills.
During this early phase, it’s important to focus on consistency. Instead of striving for perfect prints, aim to create stable, reliable prints that consistently work. This will give you the confidence to start experimenting with more advanced designs and settings as you continue your journey in 3D printing. As you become comfortable with your printer, don’t rush into complex projects; instead, take your time and fully understand the processes that are fundamental to good 3D printing practices.
Embracing Experimentation: Trying New Designs and Materials
Once you’ve gained a basic understanding of how 3D printing works, it’s time to push beyond the fundamentals and start experimenting with new designs and materials. Experimentation is a crucial component of becoming proficient in 3D printing. By trying out different materials, tools, and printing settings, you can gain a deeper understanding of how various factors impact the final print quality and functionality. The key here is to maintain an open mindset and embrace the idea that failure is an opportunity to learn and improve.
When experimenting with new designs, it’s essential to start simple. As a beginner, you may want to create functional objects, such as tool holders, phone stands, or decorative items. These projects can teach you how to incorporate more complex features, such as moving parts, overhangs, and intricate geometries, into your prints. Each new design introduces new challenges, allowing you to refine your problem-solving abilities and broaden your skill set.
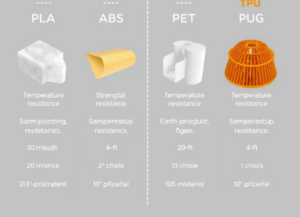
Material experimentation is another area where a lot of growth happens. While PLA is a great starting material for beginners, there are many other options to explore as you gain experience. ABS, for instance, is more heat-resistant and flexible, making it suitable for more industrial applications. Materials like TPU (flexible filament) can be used to create soft, bendable parts, while PETG offers durability and a higher resistance to wear. Each material has its own unique properties, such as printing temperature, cooling time, and strength, and understanding how to work with each will help you select the best material for each project.
In addition to experimenting with different materials, try adjusting key print settings such as layer height, print speed, and temperature. Small changes in these settings can drastically impact the final print quality. For example, a lower layer height results in smoother, finer prints, while a higher print speed can reduce print time but may compromise the overall quality. Through experimentation, you’ll learn which settings work best for each type of material and design.
Moreover, experimenting with print supports, bed adhesives, and post-processing techniques can greatly improve the quality of your prints. Supports help to maintain overhangs and intricate geometries, but improper support can lead to marks or damage to your print. By experimenting with different support structures and methods, you can ensure that your prints maintain both their strength and appearance. Post-processing techniques like sanding, painting, and assembly will also help you bring your prints to life and improve their final look.
Iteration: Learning from Mistakes and Refining Your Skills
Iteration is one of the most important aspects of mastering 3D printing. It is the process of continuously refining your designs and techniques based on feedback from previous prints. Rather than expecting perfection on the first try, successful 3D printing requires you to view each mistake as a learning opportunity. The more you iterate, the more proficient you will become, and the closer you will get to achieving flawless prints.
One of the key aspects of iteration is adjusting design files. For instance, if your print fails because the part is too thin or doesn’t fit together properly, you’ll need to modify the design. This process might include tweaking dimensions, adjusting the positioning of parts, or changing the tolerances between connected pieces. Each design iteration brings you closer to a more refined and functional object.
It’s also important to iterate on your print settings. If your first print has issues such as warping, stringing, or poor layer adhesion, adjusting the settings can often correct these problems. For example, increasing the print bed temperature can help with adhesion, while reducing print speed can improve layer bonding. Each time you encounter an issue, don’t be afraid to tweak the settings and test again. Over time, you’ll develop a strong intuition for what works best with your specific 3D printer and materials.
Another area that benefits from iteration is the use of supports. Learning how to design and manage supports effectively is essential for creating clean, professional-quality prints. The first time you print a model with overhangs or intricate details, you may find that the supports leave unsightly marks or are difficult to remove. Iterating support structures by adjusting their density, angle, or type can make a big difference in the final result.
Iteration also extends to post-processing techniques. After printing, you may want to smooth out rough edges, add finishing touches, or assemble parts. These processes often require practice to perfect. By experimenting with different techniques, such as sanding, polishing, or painting, you’ll find methods that yield the best results. Remember, iteration doesn’t just apply to the design and printing phases—it’s a continuous process that also includes refining the post-printing steps.
Advanced Techniques: Moving Beyond the Basics
Once you’ve mastered the basics of 3D printing, it’s time to delve into more advanced techniques that will set you apart as an expert. Advanced 3D printing requires a higher level of technical knowledge and design complexity, but it also opens the door to creating more intricate and functional parts. Some of the advanced techniques that experts often use include multi-material printing, dual-extrusion printing, and the integration of electronics into printed objects.
Multi-material printing allows you to print objects with different types of filaments, combining the strengths of each material in a single print. This technique requires printers with multiple extruders, such as the Prusa i3 MK3S+ or the Ultimaker S5, which can print with two or more materials simultaneously. By using different materials for different parts of the object, you can create prints that are both functional and aesthetically complex.
Dual-extrusion printing takes multi-material printing to the next level, allowing for the creation of more intricate designs with multiple colors or materials. This process involves using two different filaments, one for the primary structure and another for support or additional features. Dual-extrusion printing can be tricky to master, but with practice, it can enable the production of prints with movable parts, varying textures, and greater structural integrity.
Another advanced technique is the integration of electronics into your 3D prints. With the rise of 3D printed circuits and flexible electronics, it is now possible to print not only mechanical parts but also fully functional electronic devices. By incorporating conductive materials into your designs, you can create objects like light-up sculptures, wearable technology, or even simple robots. These types of projects require a deep understanding of both electronics and 3D printing, but they represent the cutting edge of the field.
Lastly, mastering post-processing techniques is essential for experts who want to create professional-quality prints. Advanced post-processing methods like resin smoothing, UV curing, and electroplating can significantly enhance the look and functionality of 3D-printed parts. By investing time in mastering these techniques, you can take your prints from hobby-grade to industry-ready, opening up new possibilities for commercial applications.
The Journey Never Ends
The road from novice to expert in 3D printing is one of continuous learning, experimentation, and iteration. There are no shortcuts to mastery, and even the most experienced 3D printing professionals continue to learn and adapt. The process is dynamic, constantly evolving with new technologies, materials, and techniques that challenge even the most seasoned experts.
By embracing a mindset of experimentation and iteration, beginners can avoid frustration and enjoy the journey of growth. Every failure is an opportunity to improve, and each new technique learned brings you closer to mastering the art of 3D printing. With dedication, patience, and a willingness to learn, anyone can become an expert in this exciting field.
As technology progresses, the boundaries of what is possible with 3D printing continue to expand. Innovations in materials, software, and printers themselves will continue to reshape the way we create and build. Whether you’re designing functional parts, artistic objects, or even entire buildings, the world of 3D printing offers endless possibilities.
By following the steps outlined in this article and adopting an iterative approach, you can start your journey into the world of 3D printing with confidence. Keep experimenting, keep iterating, and enjoy the learning process—it’s all part of becoming an expert. As you refine your skills and gain more experience, the possibilities for what you can create are virtually limitless.
Frequently Asked Questions (FAQ)
1. What are the essential things a beginner should know before starting 3D printing?
Before diving into 3D printing, it’s important to understand the basics of how 3D printers work. Beginners should familiarize themselves with key terms like FDM (Fused Deposition Modeling), filament types (PLA, ABS, etc.), and the components of a 3D printer (extruder, hot end, print bed). Starting with easy-to-print projects like basic designs and small objects helps you understand the settings and learn troubleshooting techniques for common issues like adhesion and print quality. Patience is crucial as it takes time to get familiar with the technology.
2. What is the best 3D printer for beginners?
For beginners, it’s recommended to start with user-friendly, reliable, and affordable 3D printers. Popular choices include the Creality Ender 3, Prusa Mini, and Anycubic i3 Mega. These printers have large communities, plenty of online tutorials, and easy setup, making them perfect for learning the basics of 3D printing. As you become more experienced, you can move on to more advanced models with features like multiple extruders and better print quality.
3. How do I improve the quality of my prints?
Improving the quality of 3D prints involves experimentation and adjusting various print settings. Start by ensuring your print bed is level and properly calibrated, as this is essential for print adhesion. Adjusting print temperature, speed, and layer height can also significantly impact the print’s appearance and strength. Using high-quality filament and experimenting with supports for complex models are additional ways to enhance print quality. Iteration is key—make small adjustments based on each print’s outcome to improve over time.
4. What materials should I use for my first few prints?
PLA (Polylactic Acid) is the most recommended material for beginners. It is easy to print with, doesn’t require a heated print bed, and is available in a wide range of colors. As you gain experience, you can experiment with other materials like ABS (which is more heat-resistant and flexible), PETG (durable and impact-resistant), or TPU (flexible filament). Each material has its own printing characteristics and challenges, so it’s important to read about each one before experimenting.
5. What should I do when my print fails?
Failure is an expected part of the 3D printing process, especially for beginners. Common causes of failed prints include improper bed adhesion, warping, incorrect temperatures, or poor model design. If a print fails, carefully examine the settings you used and the print’s physical issues to identify what went wrong. For example, if the print is lifted from the bed, increasing the bed temperature or using a different adhesive may help. Learning to troubleshoot each type of failure will improve your skills and ensure better results in the future.
6. How long does it take to become proficient in 3D printing?
Becoming proficient in 3D printing can take several months to a year, depending on how frequently you experiment and iterate on designs. Early on, learning the ins and outs of your printer and basic techniques can take a few weeks. However, mastering more complex designs, materials, and settings will require ongoing practice. The key is to be patient, keep experimenting with new projects, and learn from your mistakes. The more hands-on experience you gain, the faster you will improve.
7. Can I create moving parts or complex designs with 3D printing?
Yes, 3D printing is highly versatile, and moving parts can be created with careful design. For example, hinges, gears, and interlocking parts can be printed using techniques like designing parts with clearance between them. Some advanced techniques, such as dual-extrusion printing, allow for more complex and detailed designs, where different materials are used to print parts with different properties. Learning how to design and print these types of parts takes practice, but it’s possible as you grow your 3D printing skills.
8. How do I clean and maintain my 3D printer?
Regular maintenance is essential for keeping your 3D printer in good working condition. This includes cleaning the print bed, checking the extruder for clogs, and ensuring the moving parts are free from dust and debris. It’s also important to recalibrate the printer as needed, especially the bed leveling. Some parts, like the nozzle, may wear out over time and need to be replaced. Keeping your printer clean and regularly inspecting its components will help extend its lifespan and ensure high-quality prints.
9. How can I learn more about 3D printing and stay updated on new developments?
There are many online resources available for learning about 3D printing, including forums, YouTube channels, blogs, and online communities. Websites like Reddit’s 3D printing subreddit, Thingiverse, and MyMiniFactory provide opportunities to interact with other enthusiasts, ask questions, and share experiences. Many 3D printing manufacturers also offer instructional videos and manuals to help you understand specific printer models. Staying connected with the community and continually experimenting will help you stay updated on new techniques, materials, and advancements.
10. What advanced techniques should I explore after mastering the basics?
Once you’re comfortable with the basics, consider exploring advanced techniques like multi-material and dual-extrusion printing. These techniques allow you to combine different types of filaments or colors within a single print, creating more intricate and durable designs. You can also look into integrating electronics into your prints, such as creating 3D-printed circuits or combining mechanical and electrical components. Additionally, experimenting with advanced post-processing methods like sanding, painting, and resin curing will elevate the final finish of your printed objects.
Resources for Further Learning
For those looking to expand their 3D printing skills and find high-quality materials and accessories, websites like MatterHackers provide a comprehensive selection of 3D printers, filaments, and related products. They also offer a variety of tutorials and educational resources that can help you improve your printing process and troubleshoot common issues. To explore more, visit MatterHackers.com for all your 3D printing needs and resources.
Stay tuned to our blog where we will discuss 3D printing!!!

