Step-by-Step Guide to Merging Two 3D Printers
Learn how to merge two 3D printers to boost efficiency, increase build volume, and enable dual-material printing. Follow this comprehensive guide for optimal results.
Merging two 3D printers into a unified system opens up new possibilities for scaling up your projects and expanding your creative potential. By effectively combining two printers, you can increase your build volume, streamline your workflow, and explore new dual-material printing options. This guide will take you step by step through the entire process, from understanding the benefits of merging two printers to the hardware and software setup, calibration, and troubleshooting. By the end, you will be equipped with the knowledge to get the most out of your two-printer setup.
Step 1: Understanding the Benefits of Merging Two Printers
Before diving into the technical aspects of merging two 3D printers, it is crucial to fully understand the advantages that this setup brings to your workflow. These benefits range from an increased build volume to the ability to print with multiple materials, making it an exciting option for both hobbyists and professionals.
Increased Build Volume
The most obvious benefit of merging two 3D printers is the increased build volume. A single printer limits your printing size to its maximum dimensions, but by merging two printers, you can effectively double the space available for printing, allowing you to create much larger objects. For example, if you have two printers with build areas of 200mm x 200mm each, merging them could give you a combined build area of 400mm x 200mm or 200mm x 400mm, depending on how you position the printers. This setup is ideal for large models or objects that would otherwise be too big to fit on a single printer. Additionally, this expanded build space can be used to print larger prototypes, creating more detailed models, or working on intricate designs that require more space.
Dual-Material Printing
Another significant advantage of merging two 3D printers is the ability to print with two different materials at the same time. This opens up exciting possibilities for creating complex parts that require different physical properties, such as flexibility, strength, or even different colors. For instance, you might print a structural component with a strong material like PLA or ABS, while printing flexible components like gaskets or seals with TPU (Thermoplastic Polyurethane). This dual-material capability is especially beneficial when working with intricate designs that require varying material properties across the print. Additionally, dual-material printing also allows for multi-color models, where each printer can be assigned a different filament, creating striking visual effects.
Improved Productivity
Merging two printers into a single system also improves productivity by enabling you to print multiple parts simultaneously. This can be particularly useful when working on projects that involve multiple components, as you can split the work between the two printers. For example, one printer might handle the printing of a basic solid structure, while the second printer can focus on more intricate details or smaller parts. By leveraging both machines, you can reduce the overall printing time for complex objects and multi-part designs, thus boosting your overall efficiency. This dual-printer setup is especially valuable in professional or industrial environments where speed and output are crucial.
Reduced Cost and Space
While purchasing a larger, more powerful 3D printer might seem like a good idea to expand your capabilities, merging two smaller machines into a unified system can be more cost-effective. Rather than investing in a single larger printer, which can be expensive, you can combine two smaller, more affordable machines to achieve the same or even better results. Moreover, this approach is space-efficient. Instead of requiring two separate workspaces, you can place both printers side by side, sharing a common area. This setup reduces both the financial and spatial cost of upgrading your 3D printing capabilities, making it an attractive option for hobbyists and businesses alike.
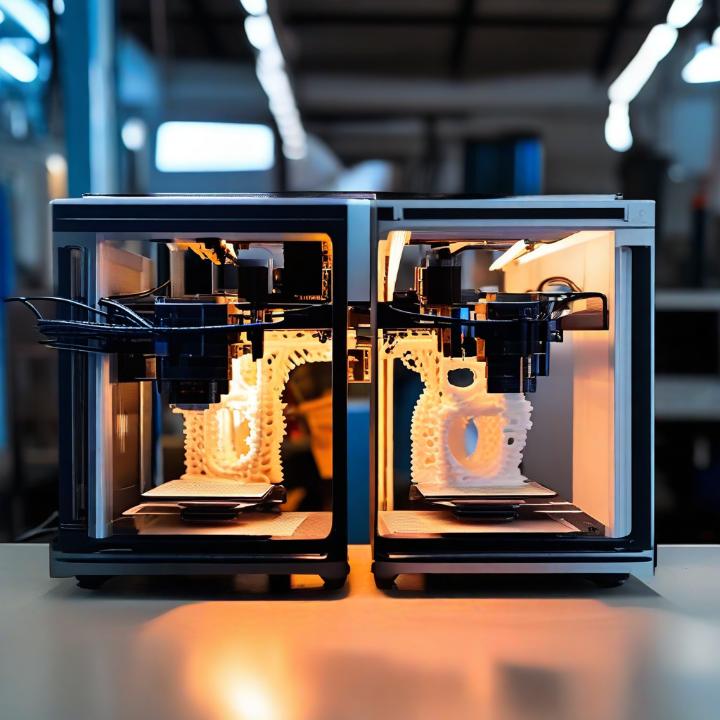
Step 2: Hardware Setup
The next step in merging two 3D printers is setting up the hardware so that both machines function together seamlessly. This includes physical placement, wiring, and aligning the extruders to ensure that they operate in sync.
A. Align the Printers
The first step in the hardware setup is positioning the two printers next to each other. You need to place the machines on a stable, flat surface where they won’t be affected by external vibrations or movements. Ideally, the printers should be positioned side by side, ensuring they have enough space between them to avoid interference. If you’re merging printers that are close in size and design, you may be able to align them perfectly for maximum efficiency. However, for larger or differently sized machines, make sure they are placed with enough clearance to allow both printers to operate without obstructing each other.
A critical aspect of alignment is ensuring that the print beds are level. Each printer’s bed must be accurately leveled to ensure proper adhesion of the printed material. Use a bed leveling tool such as a digital caliper or feeler gauge to ensure that the print beds are parallel to each other. If you’re planning to use a shared print bed, the leveling process will require a bit more attention, as you’ll need to ensure that both printers are in sync with the shared bed.
B. Create a Shared Print Bed (Optional)
For large-scale projects that span both printers, a shared print bed can be an essential component of the setup. A shared print bed allows both printers to work on a single object simultaneously, reducing the need for splitting large prints into smaller parts. Construct a flat, stable surface—often made from aluminum or glass—that is large enough to accommodate both machines. A shared bed also means you won’t have to worry about misalignment when printing larger objects. However, setting up a shared bed requires careful calibration and attention to detail to ensure that both print heads are at the correct Z-axis height and that they can work in tandem without obstruction.
C. Align the Extruders
To ensure that both printers work in perfect sync, the extruders must be aligned accurately. Misalignment between extruders can result in uneven prints, poor adhesion, or failed prints. Begin by checking the Z-axis height for both extruders. You should ensure that both extruders are at the same level from the print bed, as this guarantees that the first layers of the print will be laid down evenly. You can use paper or a digital caliper to check the height of each nozzle. Once the extruders are correctly aligned, you can move forward with ensuring that they print accurately across the entire model.
Step 3: Software and Firmware Synchronization
Now that the hardware is in place, it’s time to ensure that the printers are synchronized through the software and firmware. The two machines need to communicate with each other effectively to print the same model, and software plays a key role in this process.
A. Install a Unified Controller Board
To control both printers from a single interface, you’ll need to install a unified controller board. Popular options include boards like Duet 3D or RAMPS 1.4, which are designed to manage multiple extruders, motors, and other components. This central controller is essential for running both printers simultaneously while preventing them from interfering with each other. The board should be able to handle the stepper motors, heated beds, and extruders from both machines.
Once the controller board is in place, wire it according to the manufacturer’s instructions, ensuring that each printer’s components are properly connected. Label the connections to avoid any confusion. The controller board should be connected to each printer’s extruder, motor, and heated bed to facilitate the synchronized printing process.
B. Configure the Firmware
Firmware is what allows the controller board to communicate with the 3D printers. Common firmware like Marlin or Klipper can be customized to handle the unique requirements of a dual-printer setup. After installing the firmware, you will need to modify the settings to support multiple extruders and motors. Enable multi-extruder settings in the firmware to make sure that both printers print at the same time without interfering with one another. The firmware also needs to be calibrated to recognize each printer’s specific settings, such as the number of extruders, bed size, and motor configurations.
C. Set Up the Slicing Software
The slicing software is what takes your 3D model and breaks it down into instructions for the printer. Popular options like Cura or PrusaSlicer support multi-extruder setups, allowing you to assign different parts of the model to each printer. Within the slicing software, you can also adjust print settings for each extruder, such as temperature, print speed, and material type. If you plan to use multiple materials, assign each material to a separate extruder to ensure that the printers handle different filaments simultaneously. You should also configure the software to handle the build volume of both printers, ensuring that the model is split accordingly across the two machines.
Step 4: Calibration and Testing
Once you have completed the hardware setup and synchronized the software, the next critical step is calibration. Proper calibration ensures that both 3D printers function together as a cohesive unit, avoiding misprints and ensuring a smooth printing process.
A. Bed Leveling
Start by leveling both print beds individually. Accurate bed leveling is essential for ensuring proper adhesion, reducing warping, and preventing print failures. Use an automatic bed leveling system like BLTouch if your printer supports it, or manually level the beds using a piece of paper or a feeler gauge. Once the beds are leveled, check the Z-axis for both extruders to make sure they are aligned at the same height.
B. Test Extruder Calibration
Next, check the extrusion rates of both extruders. Run basic calibration prints, such as simple cubes, to ensure that each extruder is extruding the right amount of filament. Test each extruder’s flow rate and adjust if necessary. If one extruder is under-extruding or over-extruding, you may need to modify its settings in the firmware to correct the flow rate.
C. Print Test Models
Before starting a full-scale print, run a few small test models to verify that both printers are printing correctly. Watch for any issues such as layer misalignment, improper extrusion, or uneven layers. Pay close attention to the first few layers of the print, as this is where adhesion and alignment issues often arise.
Step 5: Running Test Prints and Troubleshooting
After calibrating the printers, it’s time to test your dual-printer setup. Run test prints to make sure that everything is functioning correctly.
A. Run Small Test Prints
Start with a simple model, such as a calibration cube or a small object, to verify that both printers are printing correctly. This will help you detect any issues with alignment or extrusion early on. Keep an eye on both printers as they work, making sure that they stay in sync and that there are no issues with material flow or print quality.
B. Troubleshooting
If you encounter problems during your test prints, don’t panic. Common issues include misalignment between the two extruders, inconsistent material flow, or communication problems between the printers and the controller board. To fix these issues, check the alignment of both extruders, recalibrate the bed, and ensure that both printers are configured correctly in the slicing software. Additionally, ensure that the controller board is functioning properly and that all connections are secure.
Merging two 3D printers into a single system offers a variety of benefits, from larger build volumes to the ability to print with dual materials. By carefully setting up the hardware, synchronizing the software and firmware, and calibrating the printers, you can unlock the full potential of a dual-printer setup. Whether you’re a hobbyist or a professional, this upgrade will enable you to tackle larger projects, experiment with new materials, and increase productivity, all while keeping your costs down. With the right setup and proper calibration, you can seamlessly merge two printers into a powerful tool for your 3D printing needs.
FAQs
1. What are the benefits of merging two 3D printers?
Merging two 3D printers allows for an increased build volume, the ability to print with dual materials, improved productivity, and reduced cost and space.
2. How do I align two 3D printers for merging?
Ensure the print beds of both printers are level, and the extruders are at the same height from the print bed. Proper positioning ensures smooth operation.
3. Can I print with multiple materials on two merged printers?
Yes! By merging two printers, you can assign different materials to each printer, allowing for dual-material or multi-color printing.
4. What software do I need to merge two printers?
Use a unified controller board, configure firmware for multi-extruder setups, and set up slicing software like Cura or PrusaSlicer to manage both printers.
5. How do I troubleshoot issues in a dual-printer setup?
Check for extruder misalignment, recalibrate the print beds, and ensure correct settings in the firmware and slicing software.
For more information, visit www.futureof3dprinting.com.