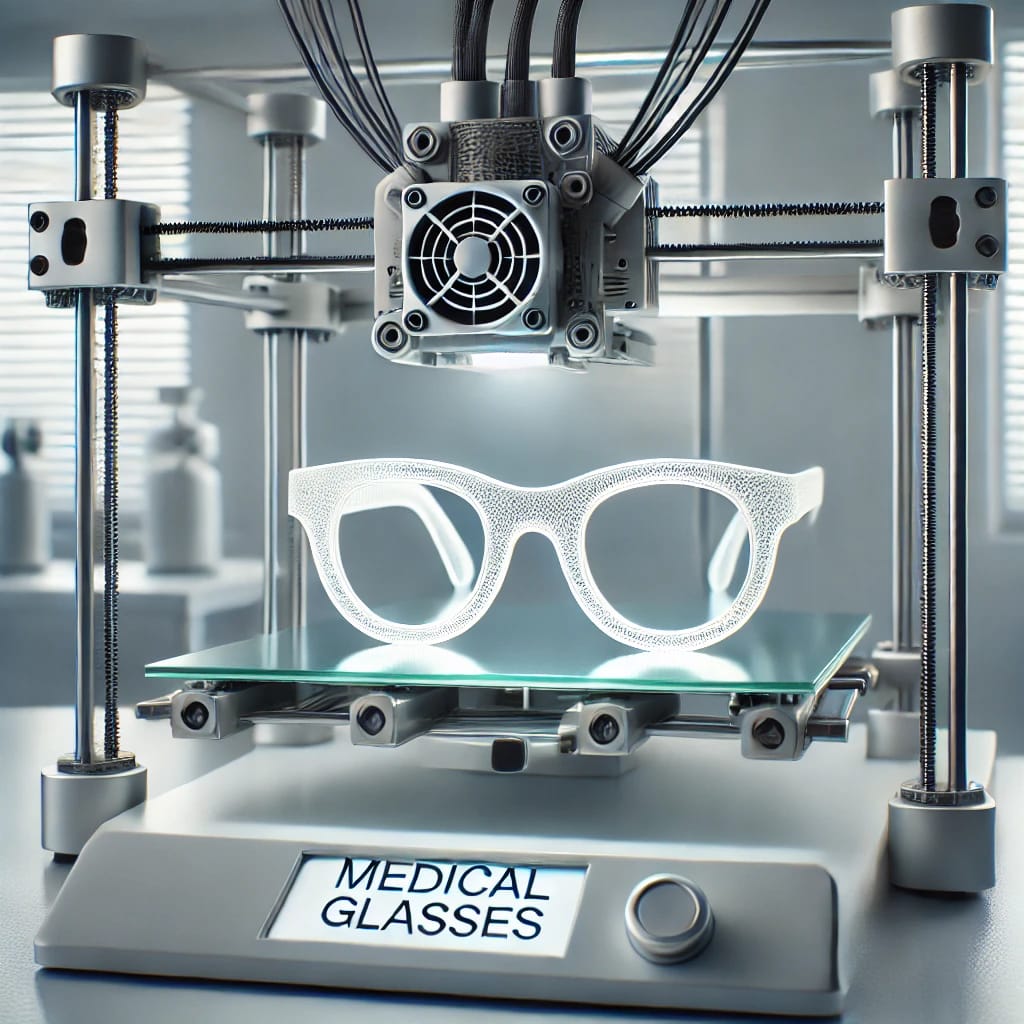
Creating A Custom 3D Printed Medical Glasses Step By Step
A comprehensive guide to designing and printing custom 3D medical glasses. Discover the process from face scanning to material selection and final assembly.
Creating Custom 3D-Printed Medical Glasses
Creating custom 3D-printed medical glasses involves a meticulous process to ensure that each pair of glasses fits the patient’s unique facial features and provides optimal vision correction. The process includes several stages: initial assessment and measurements, frame design, material selection, and printing and post-processing. Each stage is carefully executed to meet the patient’s specific needs, combining advanced technology with personalized design.
1. Initial Assessment and Measurements
The process begins with a thorough initial assessment to gather all the necessary information for creating a perfectly tailored pair of 3D-printed medical glasses. This step is fundamental to ensuring that the glasses fit well and offer the best possible visual experience.
To start, a detailed face scan is conducted using advanced 3D scanning technology. This allows for the accurate capture of the patient’s facial features, including the distance between the eyes, the width of the nose bridge, and the length of the temples. These measurements are critical in determining how the glasses will sit on the face and ensuring a secure fit.
The 3D scanning technology helps avoid the guesswork that comes with traditional eyewear fitting methods. The precision of the scan ensures that the glasses will be comfortable and snug, preventing them from slipping off or feeling too tight. The scan also provides a digital blueprint that is used in the next step of the process, where the frame design takes shape.
Alongside the face scan, the patient’s prescription details are carefully reviewed. This includes understanding the specific type of vision correction required, such as single vision, bifocal, or progressive lenses. If the patient requires any additional features, such as anti-glare coatings, blue light filtering, or specific types of lenses, these are noted during this phase as well.
The lens prescription dictates many aspects of the frame design, ensuring the glasses can properly accommodate the lenses. For example, the frame must be designed with the correct curvature to support the lenses’ shape, ensuring that the patient’s vision correction is optimal.
After obtaining the necessary measurements and prescription details, the next crucial step is verifying the patient’s unique requirements. If the patient has any special needs or preferences, such as a preference for lightweight frames or specific color choices, these are taken into consideration during the design process. The goal is to ensure both functionality and aesthetics are considered right from the start.
The accuracy of these initial measurements will directly impact the success of the entire process. If the measurements are off, the fit could be uncomfortable or misaligned, which would diminish the overall quality of the glasses. By using advanced technology and a careful, personalized approach, this step sets the foundation for creating custom 3D-printed medical glasses that are both functional and comfortable.
Finally, it’s important to communicate with the patient throughout this process to ensure that any specific preferences or additional needs are fully understood. A comprehensive consultation can prevent any issues later in the design and production phases, ensuring a seamless process and a final product that meets or exceeds expectations.
2. Designing the Frames
Once the initial measurements and prescription details are gathered, the next step is designing the frames. This is where the customization process truly begins, as 3D modeling software allows for precise control over the design to create a personalized pair of glasses.
Using design software like Blender, Rhino, or TinkerCAD, the frames are digitally crafted to fit the patient’s facial features. These programs provide a high level of accuracy, allowing designers to manipulate the dimensions, curvature, and overall shape of the frames. Designers can zoom in on specific areas to ensure the frames will sit comfortably on the patient’s face.
The customization options are virtually limitless. For example, the software allows for adjustments to the nose bridge to ensure a secure, comfortable fit. If a patient has a wider or narrower nose, the design can be adjusted accordingly. The temple length can also be customized, ensuring that the glasses rest perfectly behind the ears, further enhancing comfort.
In addition to basic frame fitting, designers can incorporate functional features into the design, such as flexible hinges and adjustable nose pads. These features improve the comfort of the glasses, making them adaptable to the patient’s preferences. Flexible hinges, for example, allow the frames to be more versatile, adjusting to different head shapes or sizes.
Another important consideration is the design of the temple tips. The tips of the glasses that rest behind the ears must be designed to prevent the glasses from slipping off during everyday activities. Small adjustments to the curvature or angle of the temple tips can make a significant difference in how the glasses stay in place throughout the day.
Additionally, the frame design may also incorporate aesthetic elements, such as color choices, texture details, or even decorative features. While the primary focus is on comfort and fit, the design process allows for personalization in terms of style, giving the patient a unique, custom look.
The design process is an iterative one, with designers often making adjustments and refinements based on feedback or new measurements. This step ensures that every aspect of the frame is tailored to meet the patient’s needs and preferences, balancing function with style.
Once the design is finalized, the 3D model is reviewed to ensure that all measurements are accurate and all functional elements are in place. Any changes needed to improve comfort, appearance, or function are made at this stage before the model is sent to the printer.
3. Selecting the Right Material
The material chosen for the 3D-printed frames plays a crucial role in the final product’s comfort, durability, and functionality. Selecting the appropriate material ensures that the glasses are lightweight, strong, and suited to the patient’s lifestyle.
One of the most commonly used materials for 3D-printed glasses is nylon. Nylon is flexible, durable, and comfortable, making it a great option for eyewear that needs to adapt to the shape of the face. Its flexibility helps ensure a snug fit, which is especially important for patients who may have specific needs for comfort.
Polycarbonate is another popular material due to its durability and light weight. Polycarbonate lenses are known for being resistant to impact, making them an excellent choice for patients who lead active lifestyles. The strength of polycarbonate helps ensure the frames maintain their shape over time, even with frequent wear.
Titanium is often selected for its lightweight yet strong properties. Titanium frames are not only durable but also hypoallergenic, making them a good choice for patients with sensitive skin. Additionally, titanium offers a modern and sleek appearance, which appeals to many patients who prefer a more contemporary look.
Each material comes with its own set of benefits, and the final choice depends on the patient’s specific needs. For example, a patient who works in a physically demanding environment might benefit from the strength of polycarbonate, while a patient with sensitive skin might prefer the hypoallergenic properties of titanium.
In addition to material strength and comfort, the weight of the frame is an important consideration. Lighter materials like nylon or titanium ensure that the glasses do not feel heavy or uncomfortable on the face, which is particularly important for patients who need to wear their glasses for long periods.
Other considerations include the material’s ability to hold up under daily wear. Materials like polycarbonate and nylon are resistant to scratches and damage, ensuring that the glasses stay looking new for a longer period. Choosing the right material ensures that the glasses are both functional and long-lasting.
Material selection also influences the overall aesthetic of the glasses. Certain materials lend themselves to different styles, so the patient’s preferences for look and feel can help guide the selection process. Once the material is chosen, the design is adjusted to account for the properties of the material, ensuring that the final product is both durable and visually appealing.
Finally, the selected material undergoes a quality check to ensure it meets the necessary standards for strength, flexibility, and comfort. Once the material is approved, the 3D printing process can begin.
4. Printing and Post-Processing
Once the frame design is finalized and the material selected, the printing and post-processing steps begin. This is the stage where the custom frames are physically created, using cutting-edge 3D printing technology.
3D printing technology allows for precise fabrication of the frame, with each layer being built up to form the final product. The printer is calibrated to the chosen material’s specific requirements, including print speed, layer height, and temperature settings. These settings ensure that the frames are printed with the correct structural integrity and finish.
During the printing process, the frames are built layer by layer, with each layer bonding to the one beneath it. This process allows for complex designs with intricate details that would be difficult to achieve with traditional manufacturing methods. The precision of 3D printing ensures that the frames are accurately crafted according to the digital design.
After the frames are printed, the post-processing phase begins. This includes cleaning the frames to remove any residual material or support structures used during printing. The frames are then smoothed to remove any rough edges or imperfections, often through techniques such as sanding or polishing. This ensures that the frames feel smooth and comfortable against the skin.
Post-processing also includes any additional treatments, such as coating the frames to enhance their durability or applying a layer of paint for aesthetic purposes. These treatments improve the overall appearance and longevity of the glasses.
Once the frames are properly processed, it’s time to insert the prescription lenses. The lenses are carefully aligned with the frames to ensure they fit properly and provide the necessary vision correction. If the frames are designed to accommodate special lenses, such as progressive or bifocal lenses, adjustments may be made to ensure the lenses are properly integrated.
A final fit check is performed to ensure the glasses are comfortable and sit correctly on the patient’s face. If necessary, minor adjustments are made to the frame or temple length to ensure a snug and secure fit. Once all adjustments are made, the glasses are ready for delivery.
The final product is a pair of custom 3D-printed medical glasses that are tailored to the patient’s specific needs. From the initial scan to the final assembly, each step is designed to create eyewear that is both functional and comfortable, improving the patient’s quality of life.

5. Lens Insertion and Final Assembly
After the 3D frames are printed and post-processed, the next critical step is inserting the prescription lenses. This step ensures that the glasses will provide the correct vision correction based on the patient’s unique prescription.
The lens insertion process begins by carefully selecting lenses that match the patient’s prescription specifications. For single-vision lenses, the process is relatively straightforward as only one lens shape is required. However, for patients needing bifocal or progressive lenses, the insertion process can be more intricate. These lenses require precise alignment within the frame, ensuring the different focal areas align with the patient’s eyes.
The lenses are then cut to fit the custom frame. A high-precision cutting tool is used to trim the lenses to the exact dimensions required for the frame. Special attention is given to the edges of the lenses to ensure they fit snugly within the frame without any gaps. Any imperfections or misalignments at this stage can compromise the functionality of the glasses, so the fitting must be perfect.
Once the lenses are cut to size, they are carefully inserted into the frame. This may involve securing the lenses with small clips or using specialized adhesives to ensure they stay in place. Some frames may include a groove or a snap-fit design that holds the lenses securely without the need for adhesives or additional tools.
The final assembly also includes testing the flexibility and durability of the frame to ensure that it holds the lenses securely during everyday use. Any excess material around the edges of the lenses is smoothed out, and any adjustments to the frame are made to ensure that the lenses do not shift or move out of alignment.
At this stage, the fit of the glasses is reassessed. The glasses are placed on the patient’s face to check for comfort, proper alignment, and how the lenses are positioned in relation to the eyes. A thorough inspection of both the frame and lens alignment ensures that the glasses are not only comfortable but also provide optimal vision correction.
Final checks are also performed to ensure that the glasses do not have any manufacturing defects, such as scratches or blemishes, on either the frame or lenses. If any imperfections are found, they are addressed by replacing the affected components, ensuring that the final product is of the highest quality.
With the lenses inserted and the frame thoroughly checked, the glasses are now ready for the final delivery. At this point, the glasses should be perfectly tailored to the patient’s needs, offering both optimal vision correction and a high level of comfort.
6. Quality Control and Fit Testing
Quality control is a critical phase in the creation of custom 3D-printed medical glasses. The primary goal is to ensure that the final product is free of defects and meets the patient’s specifications for both comfort and functionality. This step involves a comprehensive inspection of the glasses, focusing on both the design and material properties.
The first aspect of quality control involves checking the structural integrity of the frames. Any irregularities or weaknesses in the frame that could affect the glasses’ durability or comfort are identified and addressed. This includes checking for cracks, warps, or inconsistencies in the frame that might have occurred during the printing process.
Next, the fit of the glasses is tested on the patient. A professional fitter will place the glasses on the patient’s face and assess how well they fit. Are the glasses sitting comfortably on the nose? Do they stay in place without slipping or pinching? Are the temples and the bridge of the nose aligned properly? These are some of the key questions addressed during this stage.
In addition to comfort, the positioning of the lenses is assessed to ensure they align with the patient’s eyes. This step is especially important for individuals with complex prescriptions, as the lenses must be positioned precisely to provide optimal vision correction. If any misalignment is detected, the frames may need to be adjusted before moving forward.
Another critical element of quality control is the functionality of the glasses. The adjustable features, such as the nose pads and temple tips, are tested to ensure they work as intended. These elements must provide flexibility and allow the patient to adjust the glasses to their comfort preferences easily. The hinges are also checked for smooth operation, ensuring that the glasses can be easily opened and closed without any resistance or risk of breakage.
Once all these aspects are reviewed, the glasses are further tested for durability. This includes performing stress tests on the frame and temples to ensure they can withstand daily wear and tear. The glasses should be durable enough to handle the physical demands of everyday use, such as movement, pressure, and exposure to environmental elements.
The final inspection phase includes checking the aesthetic quality of the glasses. Any minor blemishes on the frame or lens are corrected, and the overall appearance of the glasses is evaluated to ensure it meets the patient’s expectations. If any cosmetic adjustments are required, they are made during this phase.
Once the glasses pass all quality control checks and meet the patient’s satisfaction, they are considered ready for delivery. The glasses are carefully packaged and prepared for shipment, ensuring they remain in excellent condition during transport.
7. Delivery and Final Adjustment
After successfully passing the quality control checks, the custom 3D-printed medical glasses are ready for delivery. At this stage, the glasses are carefully packaged and sent to the patient or optical provider.
The delivery process includes ensuring that the glasses are carefully packed to prevent any damage during shipping. Protective packaging materials are used to shield the frames from scratches or deformation, and a final quality check is performed before the glasses are sent off. This ensures that the patient receives their new glasses in pristine condition.
Once the patient receives the glasses, a final fitting session may be scheduled to ensure complete comfort and functionality. The optical provider or fitter will make any necessary adjustments to the glasses for optimal wear. For example, adjustments may be made to the nose pads, temples, or the overall alignment of the glasses to ensure they fit securely and comfortably.
If the patient is experiencing any discomfort or if there are any issues with the fit of the glasses, these adjustments can be made quickly and easily. One of the main benefits of 3D-printed medical glasses is that the materials and design can often be easily tweaked to suit the patient’s needs after delivery, ensuring continued satisfaction.
This final step allows the patient to experience the full benefits of their custom 3D-printed glasses, offering improved comfort and vision correction. It also represents the culmination of the meticulous design and manufacturing process, ensuring that the patient receives a high-quality, customized product tailored specifically to their needs.
8. Post-Delivery Support
After the glasses are delivered and fitted, post-delivery support plays a key role in ensuring the continued success and longevity of the product. Custom 3D-printed medical glasses require ongoing care to ensure they maintain their performance over time.
Support includes offering guidance on how to properly care for the glasses. Patients are educated on how to clean the lenses and frames properly, as well as how to store the glasses to avoid damage. They are also informed about any potential wear and tear that might occur with long-term use, such as frame adjustments or the need for new lenses due to changing prescriptions.
Additionally, if any issues arise after delivery, patients have access to a customer support team that can assist with troubleshooting or adjustments. This could involve reprinting the frames or replacing lenses if necessary, ensuring that the glasses continue to meet the patient’s needs throughout their use.
If the patient experiences discomfort or has any fitting issues, follow-up appointments can be arranged. These appointments provide an opportunity for further adjustments or redesigns to improve comfort or function. For example, if the patient experiences irritation from the frame material or if the fit has changed over time, these issues can be addressed with additional customization.
The ability to provide post-delivery support helps maintain the long-term satisfaction of the patient. It also ensures that any issues that might arise from changing prescriptions or wear-and-tear are handled quickly and efficiently.
Advancements and Future Trends in Custom 3D-Printed Glasses
The field of custom 3D-printed medical glasses is constantly evolving. With advancements in technology, new materials, and printing techniques are being developed to improve the quality, affordability, and accessibility of these personalized eyewear solutions.
For example, the integration of smart glasses technology is becoming a popular trend. These smart glasses incorporate features like augmented reality (AR) displays, sensors, and even health monitoring functions into the eyewear. As 3D printing technology continues to improve, it will be possible to create frames that seamlessly integrate with these high-tech components.
Another promising trend is the development of more sustainable materials. As environmental concerns grow, the demand for eco-friendly and biodegradable materials is increasing. In the future, 3D-printed medical glasses could be made from materials that are both high-performance and environmentally conscious.
Additionally, the customization process will likely become even more personalized. With the use of AI and machine learning, the design process could be enhanced to automatically adjust to a patient’s facial features, prescription, and lifestyle needs. This could lead to even greater precision in the final product, with less manual intervention required.
As 3D-printed medical glasses continue to advance, they could become an even more accessible option for individuals who require custom eyewear. Lower production costs and faster printing times may make these glasses more affordable, opening the door for more patients to access this personalized solution.
Creating custom 3D-printed medical glasses represents a significant advancement in the field of eyewear. The process, from initial assessment to final delivery, ensures that each pair of glasses is precisely tailored to the patient’s needs. By utilizing advanced technology, precise design software, and high-quality materials, these glasses provide optimal comfort, durability, and vision correction. With ongoing innovations and improvements in technology, custom 3D-printed glasses are poised to become an even more integral part of the eyewear industry.
Explore TinkerCAD, a free, easy-to-use online 3D design and 3D printing app. TinkerCAD provides beginner-friendly resources to start designing 3D-printed products, including medical glasses.