The 3D Printing Process: From Design to Final Product

3D printing, also known as additive manufacturing, has transformed the way objects are created by building them layer by layer from a digital model. Unlike traditional subtractive manufacturing, where material is removed to shape an object, 3D printing is an efficient process that minimizes waste and enables complex designs.
The process involves several crucial steps, including designing a 3D model, preparing the model for printing, configuring the printer, printing the object, and post-processing. Each step demands careful execution to ensure the best quality prints.
Industries such as aerospace, healthcare, automotive, and consumer goods have integrated 3D printing for rapid prototyping and production. The technology enables engineers to create prototypes quickly, doctors to produce customized implants, and businesses to manufacture small-scale custom products.
Understanding the entire workflow of 3D printing helps users avoid errors, optimize designs, and achieve better results. With the rapid evolution of multi-material printing, AI-driven slicing software, and advanced filaments, the technology continues to expand its possibilities.
This article provides a comprehensive guide to each stage of the 3D printing process, ensuring a smooth experience from design to final product.
1. Designing for 3D Printing
1.1 Understanding 3D Design Software
The first step in 3D printing is creating a digital model using 3D design software. These tools allow users to construct models with precise dimensions and geometries.
For beginners, TinkerCAD offers an easy-to-use interface, while advanced software like Fusion 360 and SolidWorks provides engineers with powerful modeling tools. Blender, a popular open-source option, is often used for artistic and organic designs.
Once the model is created, it must be converted into a 3D-printable file format. The most common format is STL (Standard Tessellation Language), which represents the object using triangular facets. Other formats include OBJ (for multi-color prints) and AMF (Additive Manufacturing File Format), which retains material properties and other metadata.
1.2 Key Design Considerations
Designing a printable and structurally sound model requires careful planning. Wall thickness should be optimized to prevent breakage; excessively thin walls may weaken the object, while thick walls increase material consumption.
Overhangs greater than 45 degrees require support structures to prevent sagging. Bridging, or printing horizontal sections without supports, depends on the material and printer settings.
The part orientation also plays a crucial role in print quality. Positioning a model with its strongest axis aligned with printing layers enhances durability. Additionally, adding fillets or chamfers at stress points reduces breakage risks.
By following these principles, designers can create models optimized for efficient and successful printing.
2. Preparing the Model for Printing
2.1 Using Slicing Software
After the model is designed, it needs to be processed in slicing software, which converts the digital model into G-code, the language used by 3D printers. Slicing software divides the model into layers and determines print paths.
Popular slicing software includes:
- Ultimaker Cura – a free, beginner-friendly option with broad printer compatibility.
- PrusaSlicer – provides advanced settings for high-quality prints.
- Simplify3D – offers professional tools for support generation and multi-material printing.
The slicing software also estimates print time, material usage, and layer-by-layer preview, allowing users to fine-tune settings before printing.
2.2 Configuring Print Settings
Slicing software allows users to modify essential settings such as:
- Layer height – determines resolution (0.1 mm for fine details, 0.3 mm for faster prints).
- Infill density – affects internal strength (10% for lightweight prints, 100% for solid objects).
- Infill patterns – honeycomb, grid, and gyroid structures influence mechanical properties.
- Print speed – impacts surface quality and overall strength.
Additional settings include support generation, which ensures overhangs are stable, and retraction settings, which help prevent stringing and blobs.
Careful preparation at this stage ensures a smooth and high-quality print.
3.Setting Up the 3D Printer
3.1 Choosing the Right Printer Type
Different 3D printing technologies serve various applications:
- Fused Deposition Modeling (FDM) – the most common method, using plastic filaments (PLA, ABS, PETG).
- Stereolithography (SLA) – utilizes liquid resin cured by UV light, providing high detail.
- Selective Laser Sintering (SLS) – fuses powdered materials with a laser for industrial applications.
Each printer type has unique advantages, with FDM being the most accessible and affordable, while SLA and SLS offer higher resolution and stronger prints.
3.2 Loading Material and Calibrating the Printer
For FDM printers, the filament must be loaded into the extruder and heated to the correct temperature. SLA printers require resin to be poured into the tank, while SLS printers use powdered material.
Proper bed leveling is crucial for print success. If the nozzle is too high, prints may not stick to the bed. If it’s too low, it may cause extrusion issues. Automatic bed leveling helps, but manual calibration may still be needed.
Ensuring a well-calibrated printer minimizes errors and enhances print quality.
4. The Printing Process
4.1 Starting and Monitoring the Print
Once the printer is set up, the printing process begins. Monitoring the print is essential to catch any issues early. Common problems include:
- Warping – caused by uneven cooling, especially with materials like ABS.
- Nozzle clogging – results from poor filament quality or incorrect temperatures.
- Layer shifting – caused by improper bed adhesion or loose belts.
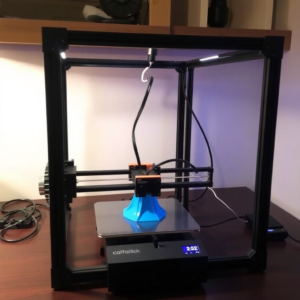
For long prints, users may set up remote monitoring cameras to check progress. Enclosures help maintain stable temperatures for materials sensitive to warping.
4.2 Multi-Material and Advanced Printing Techniques
Advanced printers support multi-material or dual-extruder printing, allowing for complex designs with flexible joints, support materials, or multi-color prints.
By fine-tuning these processes, users can create highly detailed and functional 3D-printed objects.
5. Post-Processing the 3D Print
5.1 Support Removal and Surface Finishing
Once the print is completed, support structures need to be carefully removed. This can be done using:
- Flush cutters – for breaking supports without damaging the model.
- Tweezers and pliers – for handling delicate parts.
- Dissolvable supports – available for water-soluble materials like PVA.
To improve surface quality, sanding, priming, and chemical smoothing techniques are used. For PLA, sanding with fine-grit sandpaper provides a smooth finish, while ABS can be polished with acetone vapor smoothing.
Painting and polishing can further enhance the print’s aesthetic appeal.
5.2 Strength Testing and Quality Control
After post-processing, quality control tests ensure the print meets its specifications.
- Dimensional accuracy is checked with calipers.
- Mechanical strength is tested through stress tests for functional parts.
By performing thorough quality checks, users can refine their designs and printing processes for better results.
The 3D printing process consists of several essential steps, from designing a model to preparing, printing, and post-processing the object. Mastering each stage ensures high-quality prints and fewer failures.
As 3D printing technology advances, improvements like AI-assisted design, better materials, and multi-material printing continue to expand its capabilities. Understanding these fundamentals allows users to experiment, innovate, and create complex objects efficiently.
Whether for prototyping, manufacturing, or personal projects, 3D printing provides endless possibilities for creators and engineers alike.


