Understanding the Working Process of a 3D Printer: A Step-by-Step Guide
In the past few decades, 3D printing has transformed industries across the globe, opening doors to new possibilities in manufacturing, prototyping, and even medicine. Often referred to as “additive manufacturing,” 3D printing involves creating objects layer by layer from a digital model. This innovation has allowed manufacturers, engineers, designers, and hobbyists to bring their ideas to life in ways that were once thought impossible.
From customized medical implants to intricate jewelry designs, 3D printing technology is revolutionizing the way we create and produce items. In this guide, we’ll take a detailed look at how 3D printers work, from the initial design phase to post-processing the printed object. Along the way, we’ll explore the types of 3D printers, the materials used, and the potential applications in various industries.
What is 3D Printing?
At its core, 3D printing is a manufacturing process that builds objects by layering material in successive layers. Unlike traditional manufacturing methods, which involve cutting, drilling, or machining material away from a solid block, 3D printing is an additive process where material is added to create the final object.
The primary advantage of 3D printing is that it allows for highly complex designs and geometries to be produced with minimal waste. This process can be used for rapid prototyping, creating one-off custom pieces, or even mass production, depending on the technology and materials used.
3D printers use a variety of materials, including plastics, metals, resins, and even edible materials. These materials are heated, melted, or cured to form solid objects. The technology has evolved significantly since its inception, becoming faster, more affordable, and more versatile. Today, 3D printing is used in industries ranging from aerospace to healthcare and consumer goods.
The Basic Components of a 3D Printer
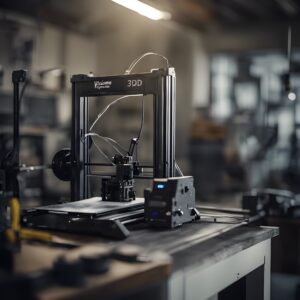
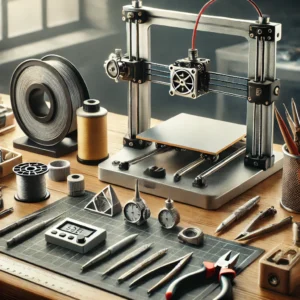
To understand how 3D printers work, it’s important to first familiarize yourself with the basic components of a 3D printer. While specific designs vary, most 3D printers share the same key parts:
-
Printer Body and Frame:
The frame is the skeleton of the printer, providing structure and stability during printing. It holds all the moving parts in place and supports the build platform and extruder. -
Print Head / Extruder:
The extruder is the part of the printer that heats and feeds the material, such as filament or resin, through the nozzle. In FDM printers, this nozzle melts the material, which is then deposited onto the build platform layer by layer. In SLA and SLS printers, a laser or light source is used to cure the material. -
Build Platform:
This is the surface on which the 3D object is printed. It may be heated to help the material adhere during the printing process. As the printer builds the object layer by layer, the build platform often moves down to allow room for each new layer. -
Stepper Motors and Sensors:
Stepper motors control the movement of the print head, build platform, and other components. These motors enable precise control over the printer’s movements. Sensors monitor factors such as temperature and positioning, ensuring the printing process proceeds smoothly. -
Cooling System:
Many 3D printers are equipped with cooling fans or liquid cooling systems to prevent overheating of the extruder and other critical components. Proper cooling is essential to ensure high-quality prints and avoid issues like warping or inconsistent layering.
The Working Process of a 3D Printer
Once the printer is set up, the 3D printing process can begin. Below, we’ll go over the step-by-step process of 3D printing, from the initial design to the final printed object.
Step 1: Designing the 3D Model (CAD Software)
The first step in creating a 3D printed object is designing the digital model. This is done using Computer-Aided Design (CAD) software. CAD programs allow designers to create highly detailed, precise models of objects in three dimensions. Popular CAD programs include AutoCAD, SolidWorks, Tinkercad, and Blender.
CAD software allows users to design complex geometries and adjust fine details, such as the size, shape, and material properties of the object. Once the design is complete, the model is saved in a file format compatible with 3D printers, such as STL (Stereolithography) or OBJ. These file types contain the three-dimensional data that the printer uses to recreate the object.
Step 2: Slicing the Model (Slicing Software)
Once the 3D model is ready, the next step is to “slice” it into thin layers using slicing software. This process is necessary because 3D printers build objects one layer at a time, so the model must be broken down into multiple slices that the printer can understand.
The slicing software takes the 3D model and cuts it into horizontal layers, producing a G-code file. This file contains the printer’s instructions, such as the path for the extruder, the layer thickness, the print speed, and the material flow rate.
During this stage, users can adjust several important settings to optimize the print, including:
- Layer Height: This determines the thickness of each printed layer. Smaller layers produce finer details but take longer to print.
- Infill Percentage: Infill refers to the internal structure of the print. A higher infill percentage results in a more solid object, while a lower percentage saves material and reduces print time.
- Support Structures: If the object has overhanging parts, the slicing software will generate support structures to prevent them from collapsing during printing.
Step 3: Printing the Model (Layer by Layer)
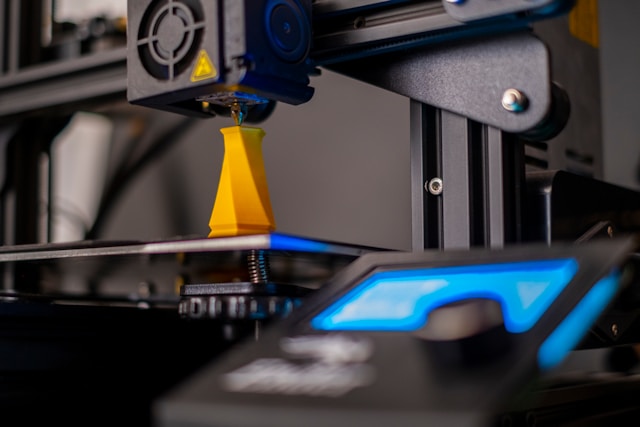
With the G-code file ready, the 3D printer can begin the printing process. The printer’s extruder heats the material to its melting point (for FDM printers) or its curing point (for SLA printers). As the extruder moves across the build platform, the material is deposited layer by layer, with each layer bonding to the previous one.
-
FDM Printing: The FDM printer extrudes a thermoplastic filament (like PLA or ABS) through a heated nozzle. The nozzle moves across the build platform, laying down molten plastic in thin layers. After each layer cools and solidifies, the next layer is applied.
-
SLA Printing: In SLA printers, a laser or light source is used to cure liquid resin, solidifying it layer by layer. The resin is applied to a build platform, and the laser selectively cures the resin according to the design.
-
SLS Printing: SLS printers use a laser to fuse powdered material, such as plastic or metal, into solid parts. The laser sinters the powder layer by layer, and the build platform lowers after each layer is complete.
Step 4: Post-Processing the Model
Once the object is printed, it often requires some post-processing to improve its appearance or functionality. The post-processing stage may include:
- Support Removal: For objects with overhangs or intricate geometries, support structures may be necessary. These structures are removed after printing.
- Smoothing and Polishing: Many 3D printed objects have visible layer lines that can be smoothed out with sandpaper or solvents.
- Curing (for SLA Prints): SLA prints often need additional exposure to UV light to fully cure the resin and improve the object’s strength and durability.
- Painting or Coating: If the object needs to be painted or coated, this is typically done after printing. Some materials can be easily painted, while others may require additional steps.
Materials Used in 3D Printing
The materials used in 3D printing are a crucial aspect of the technology, as they determine the strength, flexibility, and appearance of the printed object. Here are some of the most common materials used:
-
PLA (Polylactic Acid):
PLA is one of the most commonly used materials in 3D printing. It is biodegradable, easy to print with, and comes in a wide variety of colors. PLA is ideal for prototypes and aesthetic objects, but it is not as durable or heat-resistant as other materials. -
ABS (Acrylonitrile Butadiene Styrene):
ABS is a stronger and more durable material compared to PLA. It is commonly used for functional parts, such as automotive components and household items. However, ABS can emit fumes during printing, so adequate ventilation is necessary. -
PETG (Polyethylene Terephthalate Glycol):
PETG is a flexible, durable material that is resistant to moisture and chemicals. It is often used for applications requiring a balance of strength and flexibility, such as water bottles and food containers. -
Resins:
Resins are used in SLA printing and offer high detail and accuracy. Resin types vary, including standard, flexible, tough, and high-temperature resins. SLA printing is typically used for fine, high-resolution details. -
Metals:
Industrial 3D printers can print with metals such as titanium, aluminum, and stainless steel. Metal 3D printing is used for applications in aerospace, healthcare, and automotive industries, producing high-strength, functional parts. -
Composites:
Some 3D printers can use composite materials, which combine base plastics with carbon fibers or glass fibers for increased strength and rigidity. These materials are ideal for high-performance applications like aerospace or automotive.
Applications of 3D Printing
The versatility of 3D printing makes it applicable in numerous industries, including:
-
Healthcare:
3D printing is used to create custom prosthetics, medical implants, and even bioprinted tissues. Surgeons can use 3D printed models of organs for pre-surgical planning, improving accuracy and outcomes. -
Aerospace and Automotive:
In these industries, 3D printing is used to produce lightweight, durable parts. Custom parts can be printed on demand, reducing material waste and production time. It also allows for complex internal geometries that reduce weight without sacrificing strength. -
Consumer Goods:
From jewelry and fashion accessories to custom home decor, 3D printing allows consumers to create unique, personalized items. This has led to a rise in the popularity of 3D printing among hobbyists and small businesses. -
Food:
3D printing is even being used in the food industry. 3D printers can create intricate edible designs, allowing for the creation of custom cakes, chocolates, and other confections. -
Construction:
Large-scale 3D printing has been used in the construction of homes and buildings, offering a sustainable and cost-effective way to create affordable housing.
Challenges of 3D Printing
Despite its numerous advantages, 3D printing does face several challenges:
-
Material Limitations:
While the range of materials is expanding, it is still limited compared to traditional manufacturing. Some materials, especially metals, require specialized equipment and expertise. -
Speed:
3D printing can be relatively slow, especially for large or complex objects. The layer-by-layer nature of the process means that printing a large item can take hours or even days. -
Post-Processing:
Many 3D printed objects require extensive post-processing, such as sanding, support removal, and curing. This can add additional time and labor to the production process.
3D printing has come a long way since its invention, and its potential continues to grow. By offering customization, reducing material waste, and enabling the creation of complex designs, 3D printing has become an invaluable tool in industries ranging from healthcare to aerospace. As technology continues to advance, it is expected that 3D printing will revolutionize even more aspects of our lives, from how we manufacture products to how we personalize and create the world around us.
Whether you’re a professional in a specialized industry or simply a hobbyist exploring the possibilities, understanding the working process of 3D printing will help you harness its full potential. The future of 3D printing is exciting, and it holds great promise for continued innovation and efficiency in manufacturing, design, and beyond.

